

Scenario Description
In this tutorial we’ll create and configure:
- a Windows Server 2019 Domain Controller
(using a Hyper-V VM) - Install and configure the AD Domain services, DNS and DHCP server roles
- Set up a new domain
- Additional: A sample VM to join the new domain
Goals
- Creating your virtual machines in Hyper-V
- Promote a Domain Controller
- Configure the server roles
- Additional: Join a server to the domain
Following Tutorials
Azure AD Connect: This domain environment will be used later to sync a couple domain users to Azure with Azure AD Connect.
Windows Admin Center: We’ll use these VMs to connect them to Azure and configure the hybrid cloud services with Windows Admin Center.
Let’s start, Set up your Hyper-V VMs:
Download Windows Server 2019 Evaluation:
https://aka.ms/windowsserver (choose Windows Server on-premises) and download the ISO-file.
On your Windows 10 PC, go to Control Panel, Turn Windows features on or off and mark the checkbox Hyper-V: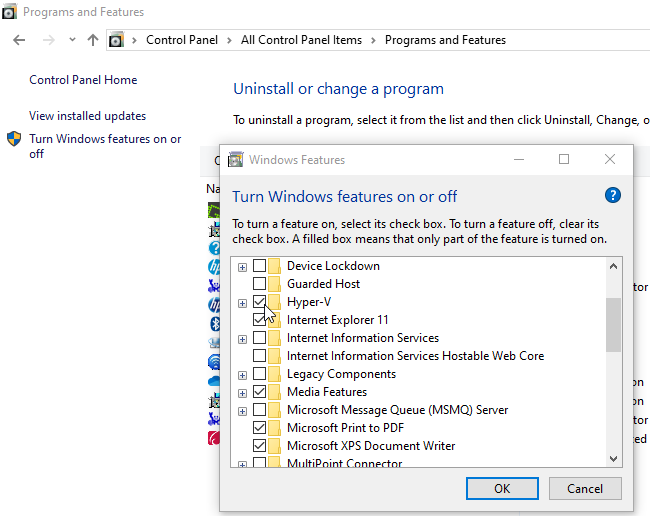
=> Tech Tip: If you encounter any problems during the Hyper-V installation, please check your Computers’ BIOS settings and enable Virtualization.
After the installation, open the Start Menu, search Hyper-V and open the Hyper-V Manager console. On the right is the Actions Pane, click on Virtual Switch Manager. Click on Internal and Create Virtual Switch. Create the Switch with the following settings: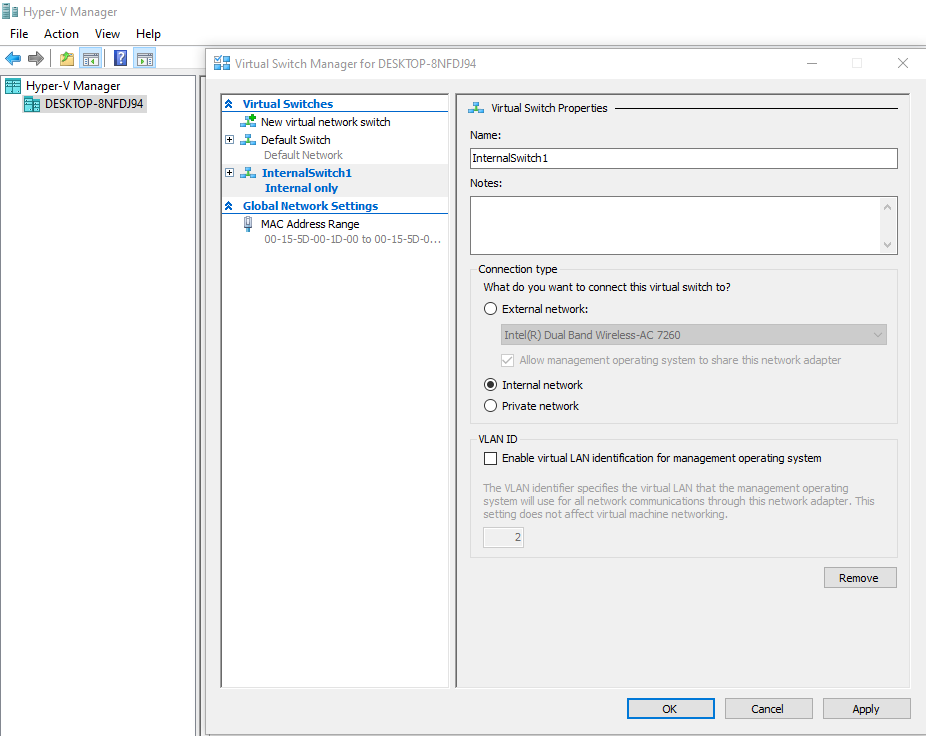
Click on Apply to create it.
Click on New virtual switch again, this time choose External and Create Switch. Create the external Switch with the following settings: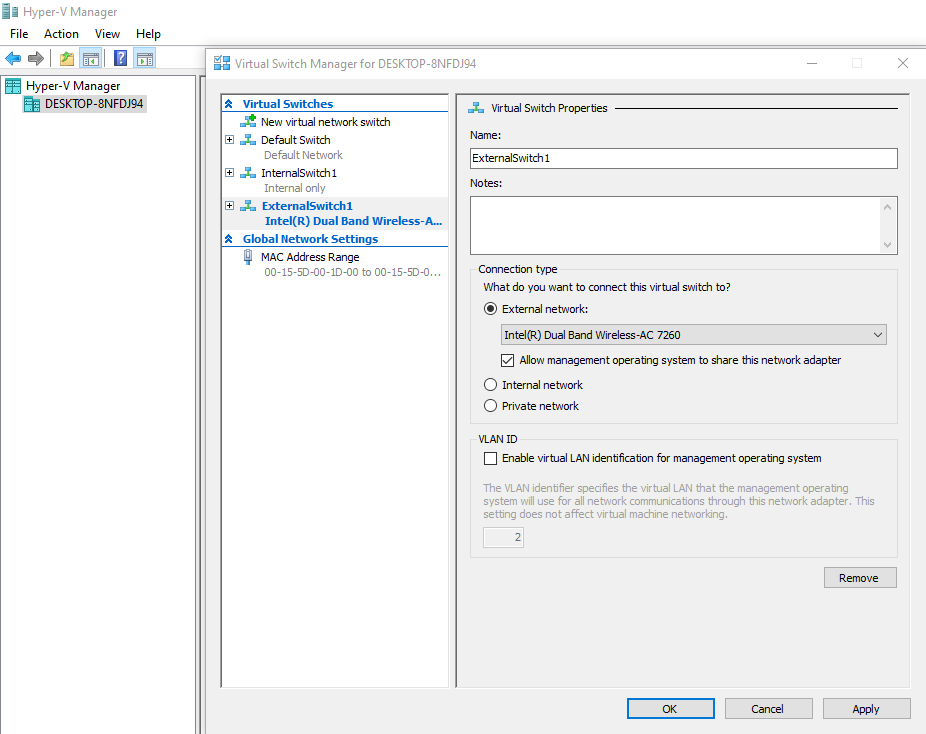
Click on Apply to create it. Explanation: The internal switch is used for our lab network, the external switch is used to provide internet connections for our servers.
=> Production Tip: This is a lab (test) environment. In a production environment you shouldn’t open internet connection for your Domain Controller and think about different VLANs (networking concept).
Back in the Actions Pane, click on New, Virtual Machine and go through the wizard, choosing these settings (don’t forget to attach the Server 2019 eval ISO):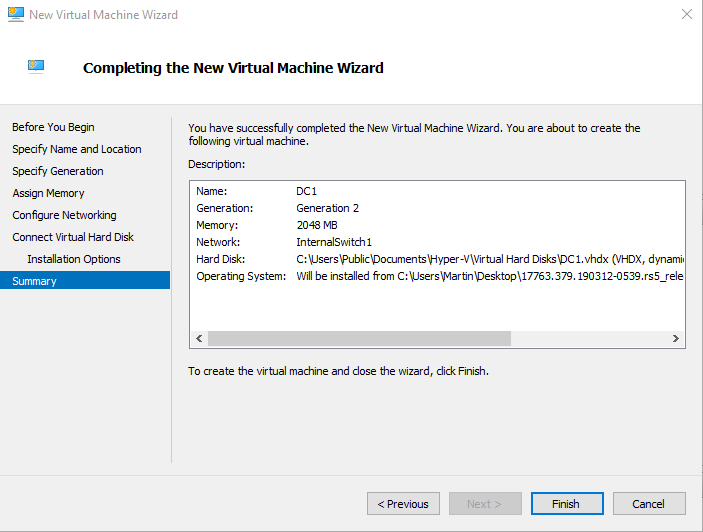
As you can see, we’re using the Standard Network Adapter for internal connections (InternalSwitch1). Now click finish to create the VM. When the VM is created, right-click it and choose Settings. On start page, click on Network Adapter and choose Add to create a second Network adapter: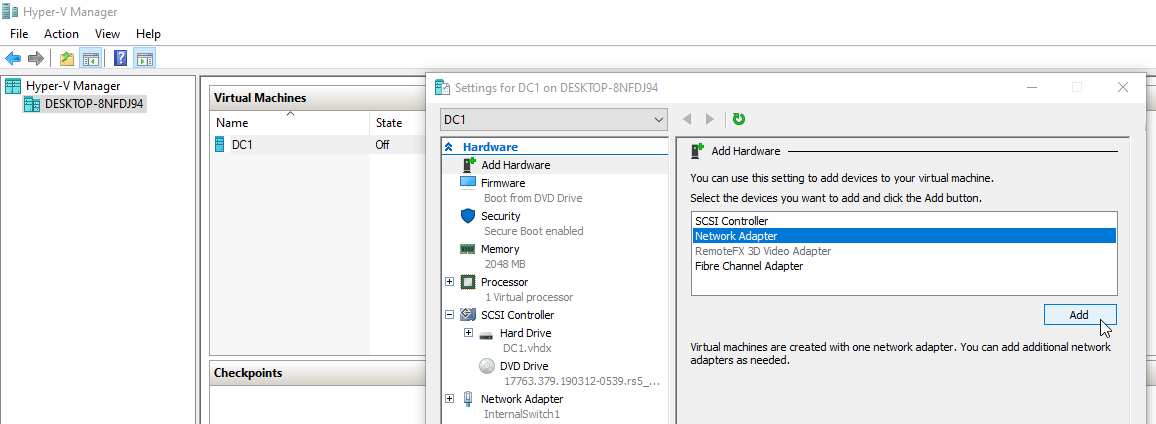
Under Virtual Switch, choose the ExternalSwitch1 and click on Apply to create the adapter.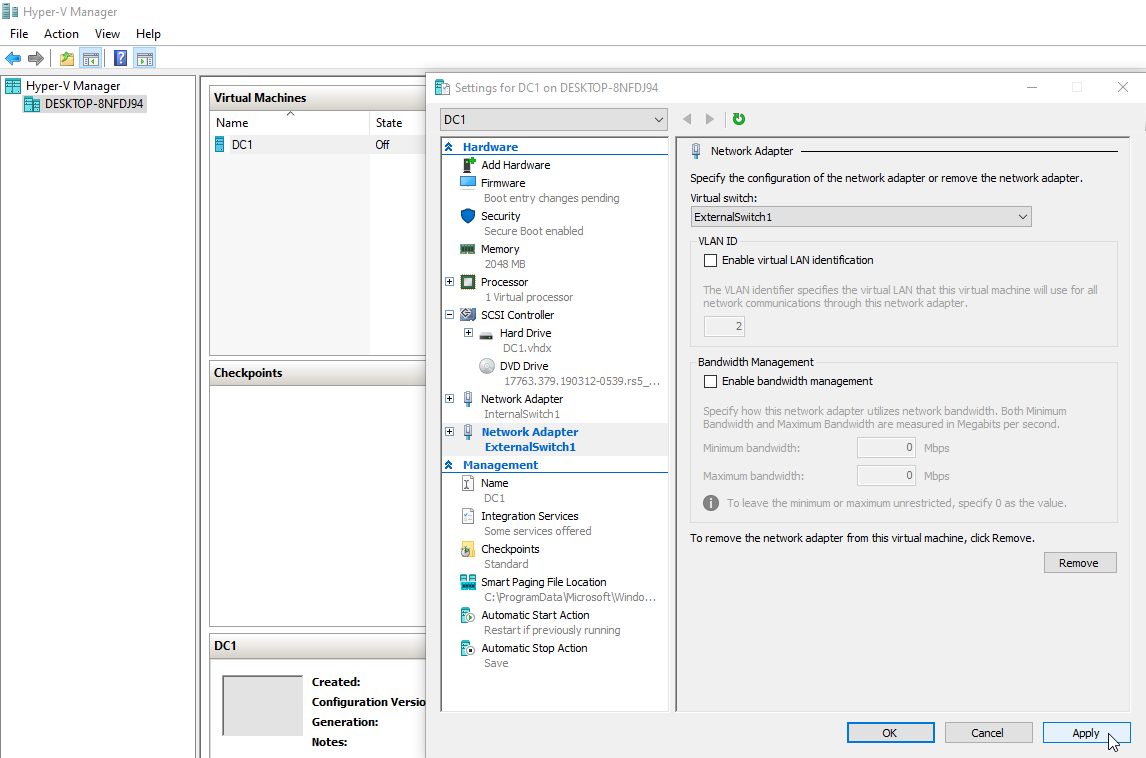
Now you’re DC1 has 2 network adapters, for internal and external connections.
Installing and Configuring Server 2019:
Click on Connect and Start it. Press a key to boot from your ISO-file. Click through the installation wizard, don’t forget to choose Windows Server 2019 Datacenter Evaluation (Desktop Experience x64) to install your VM with au GUI: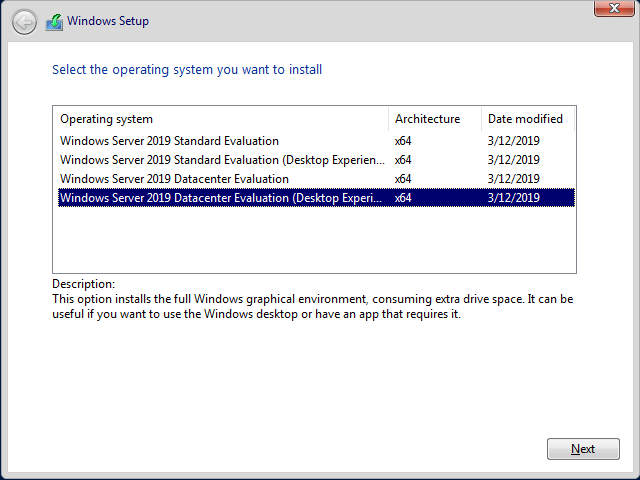
It’ll take some time and several reboots to install your new Server 2019. After the installation choose a password. Now it’s time to set a static IP address. Click the lens next to the Start Button and enter ncpa.cpl. It should look like this: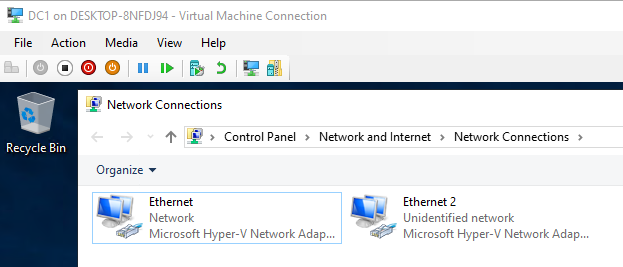
In my case, the internal network adapter was “Ethernet 2”. Double click it, Properties, Internet Protocol Version (TCP/IPv4) and set the following settings. Rename the adapters to Internal and External for better recognition, use a static IP address: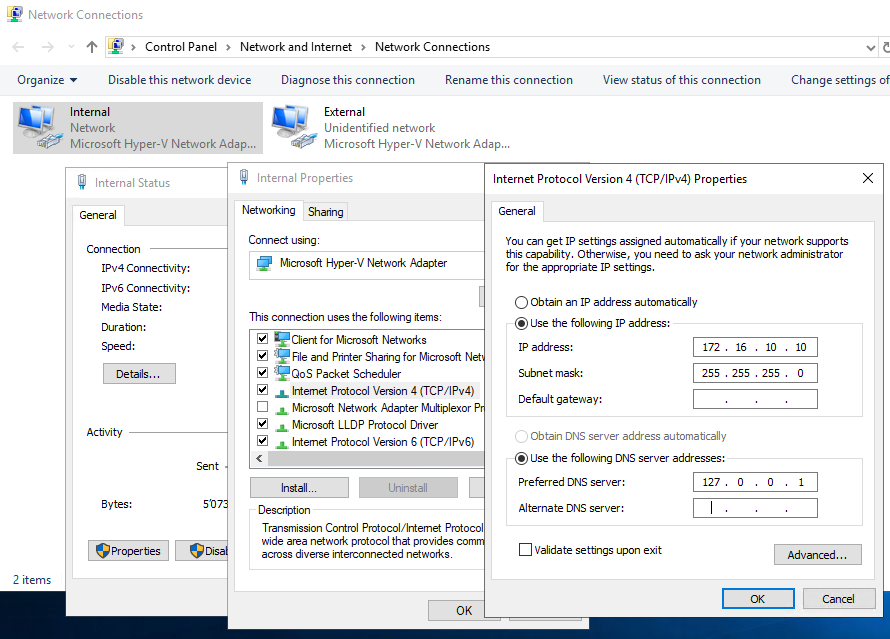
No changes to the External adapter. Close all windows with clicking Ok and restart your VM. The new IP address is now applied.
=> Tech Tip: If the network sign (next to the clock) shows an exclamation mark after the reboot, you’ve entered the static IP for the wrong adapter. You have to switch them. For this lab we use a 172.16. IP. You can also use an IP of your range.
Installing AD, DNS and DHCP roles:
=> Production Tip: In a productive environment you should now update your Domain Controller through Control panel (if an Internet connection is open) or through WSUS. You don’t want to update your new DC after 2 weeks in production. Next step, give your DC a decent name, this is the last chance to change it (Control Panel, System). Also very important: You should use separate servers for Domain Controller, DNS and DHCP services and build them redundant.
Now the server is ready for installing the additional roles. Open the Server Manager and click on Add roles and features: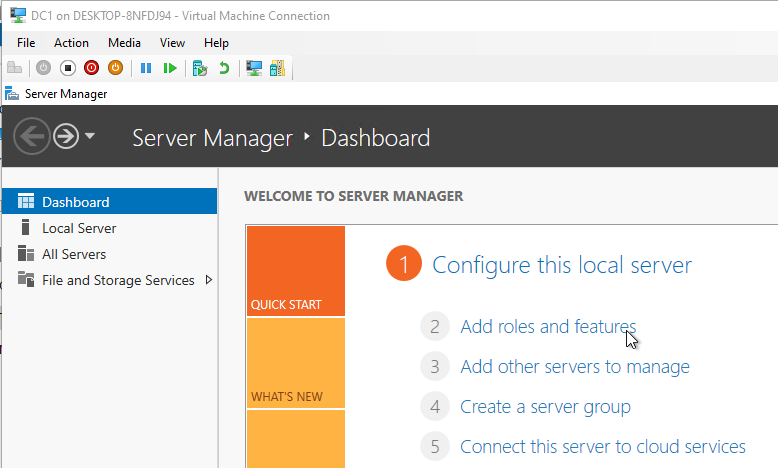
Click on Next until the following screen. Select Active Directory Domain Services, DNS Server and DHCP Server: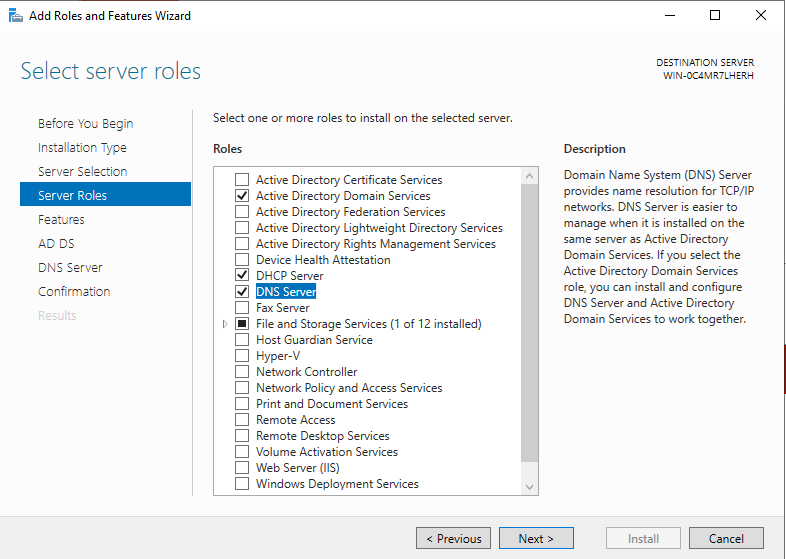
Click on Next until the end of the wizard and select Auto-Reboot, then install. It’ll take quite some time to install these 2 roles. If your server doesn’t reboot at least one time, please reboot it manually when the installation is complete.
Promote your VM to a Domain Controller
After the reboot, you should see a new notification in Server Manager, where you can promote your server to a Domain Controller:
Click on Promote this server to a domain controller. The Deployment Configuration will appear, where you select Add new forest and you can choose your own new root domain name: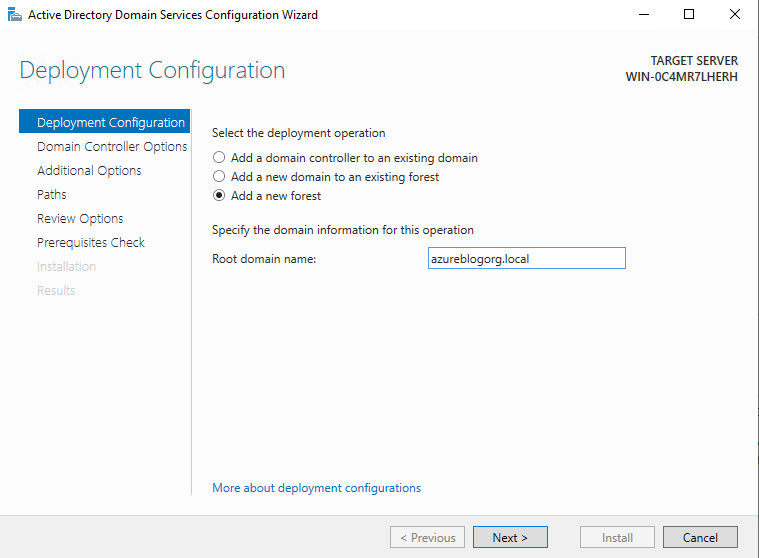
Click on next. Check if the Forest and Domain functional level is Windows Server 2016. Your DC is a Server 2019, but you can’t create a domain with the functional level 2019 yet. There’s no information from Microsoft when a 2019 forest will be possible. Make sure DNS server and GC is checked and choose a DSRM password: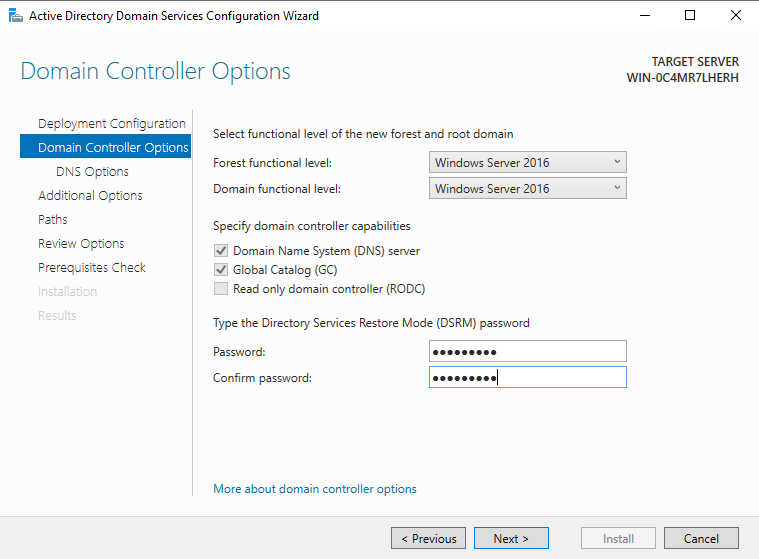
Click on next. Do not create a DNS delegation on the next screen: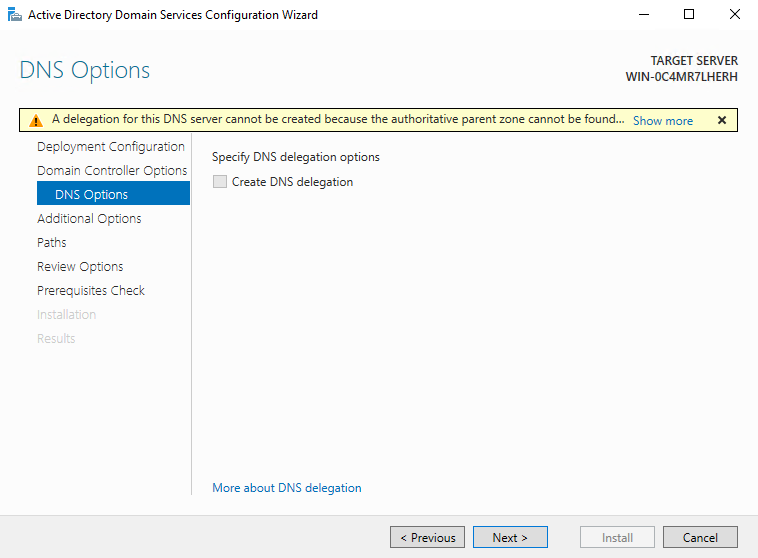
Click on next at Additional Options, Paths, Review Options. The Prerequisites Check will collect your settings. After some seconds, you should be able to click install: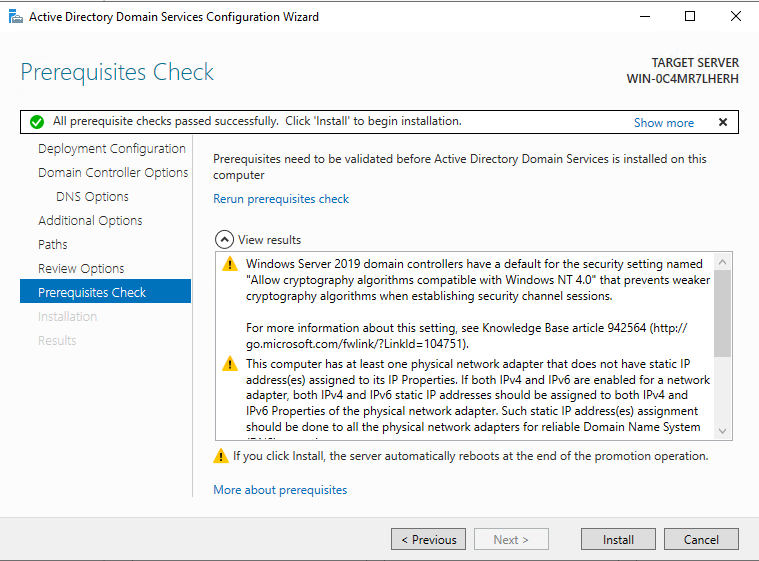
The VM will reboot automatically. Now you can see the new logon screen with your domain name: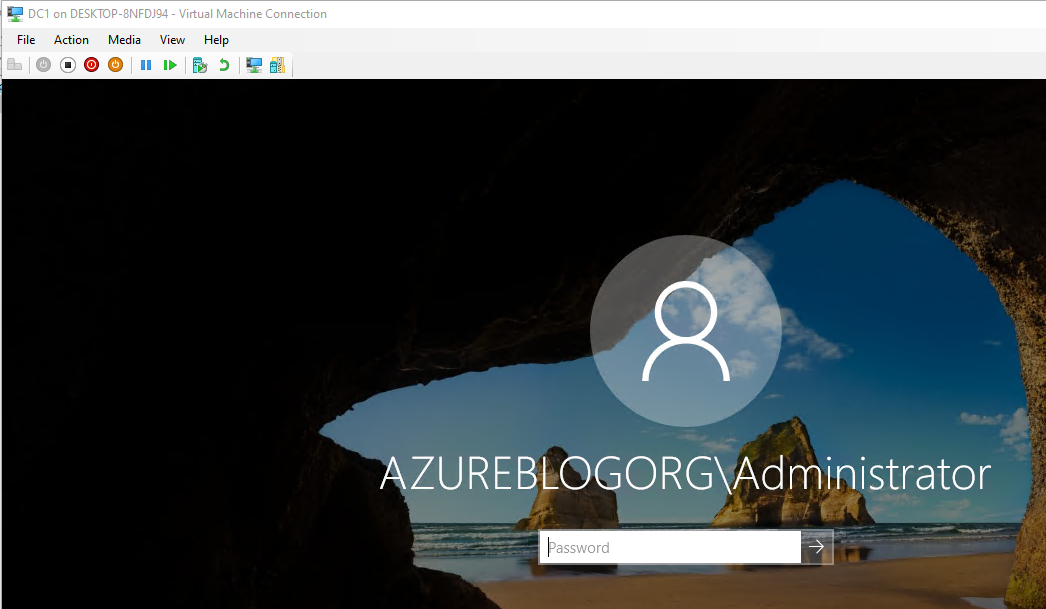
Configure DNS
The domain settings are now configured. Now we should configure the reverse DNS lookup zone for a correct name resolution. Click on the lens symbol and enter DNS. Open up the DNS Manager console. Double-click your Computername and right-click Reverse Lookup Zones. Choose New zone: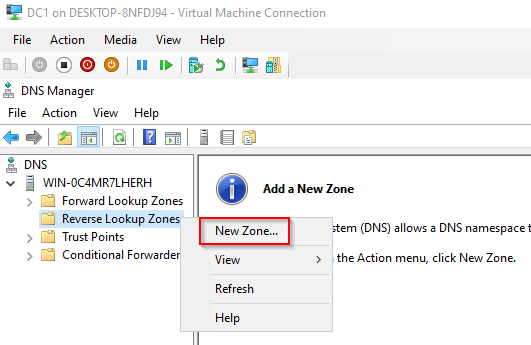
At the New Zone wizard, click on next. Make sure Primary zone and Store zone in AD is marked:
Click on next. Because we only have this DNS server, the next settings doesn’t really matter. It’s recommended to replicate your Zones to all DNS servers in the domain, leave this settings as it is: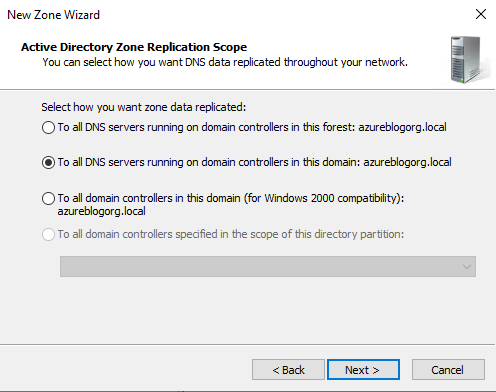
Choose IPv4 Reverse lookup Zone: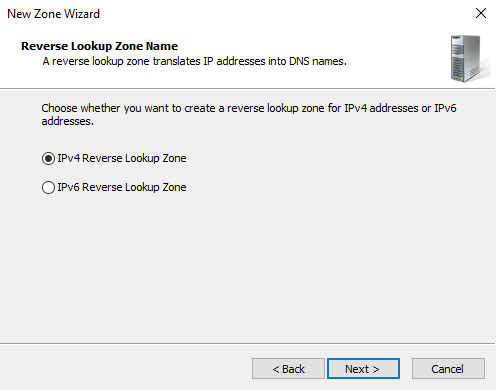
Click on next. Now you need to set the Network ID. It has to match the subnet of your network. If you can’t remember your IP address, open a CMD and type ipconfig. In my case it is 172.16.10: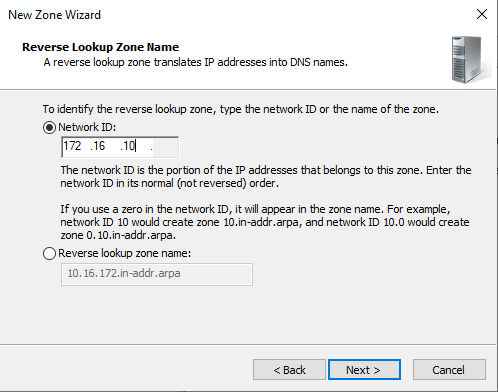
Click on next. Leave the Allow only secure updates setting: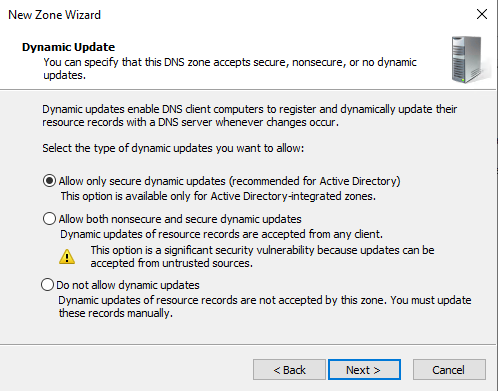
Click on next and Finish. Your new Reverse Lookup Zone is now created. New servers will automatically get a IP address in this range.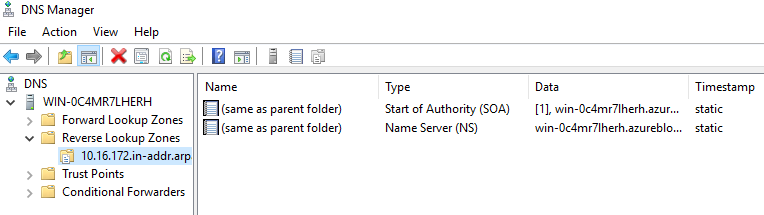
Configure Advanced DNS Settings
Now we have to configure a proper DNS name resolution. In DNS manager, right-click your Computername and choose Set Aging/Scavenging for All Zones: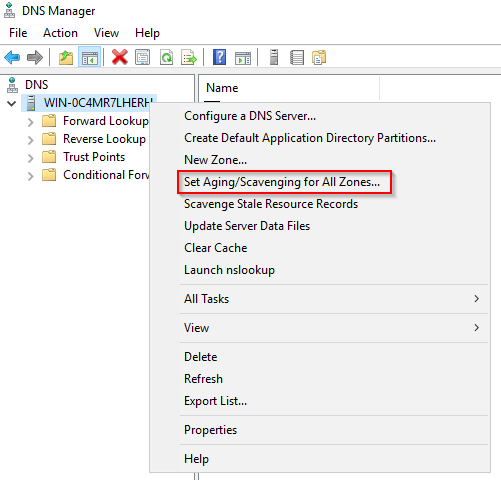
Tick the box Scavenge stale resource records: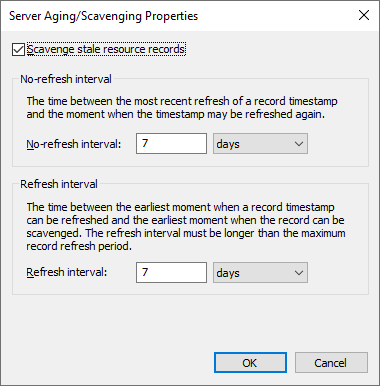
Click on OK and on the next window OK again.
Configure DHCP settings
The next step is to configure the DHCP settings. Every new server will automatically get an address in your range. Anyway, it’s really important that you set a static IP address for every new server you create. This step will be made further down in this tutorial, when we create the next server.
Click on the lens symbol and enter DHCP. Open the DHCP console. Click on your Computername. As you can see, our DHCP services are not authorized yet. Right-click the Computername and click Authorize: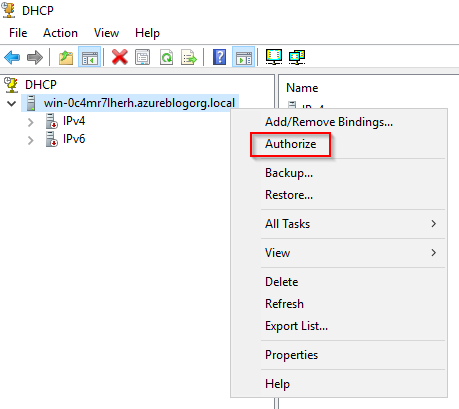
It’ll take some seconds to load. Right-click the Computername again and select Refresh. Your services should be green now. Right-click IPv4 and select New Scope: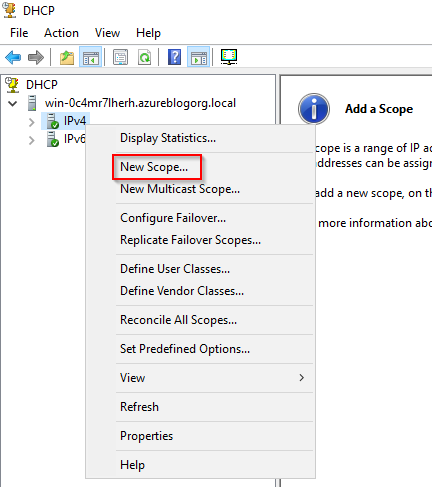
Click on Next. Choose a Name for your Scope and click on Next:
Now we need to define a Scope for new servers. Our DC1 IP address is 172.16.10.10. It’s better to separate your addresses, that’s why we choose 172.16.10.30 to 100. Use 255.255.255.0 as Subnet Mask. It’ll automatically set a Length of 24, you can leave that: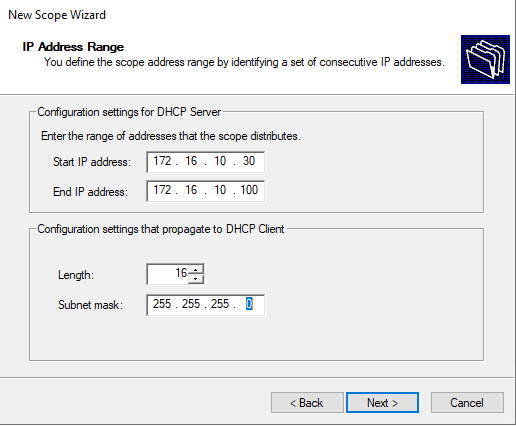
Click on Next. Click on Next at the Add Exclusions and Lease Duration screens. Then select Yes, I want to configure these options now: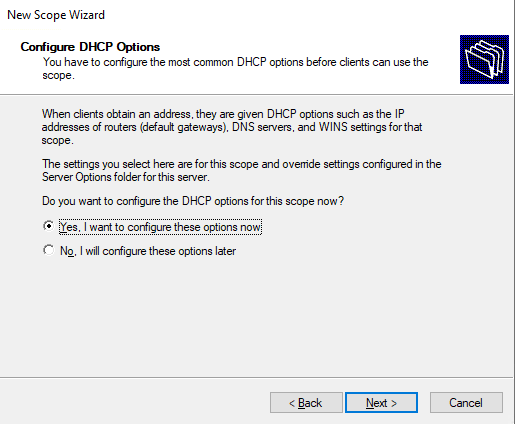
Click on Next on all the following settings and finally, Activate your Scope. Now you should see a new entry for your Scope: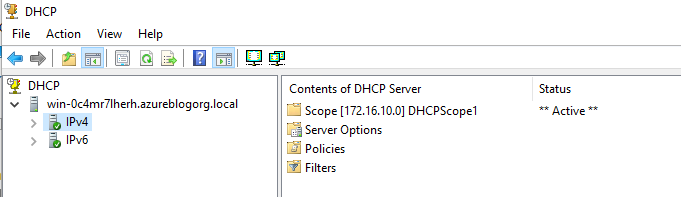
Congratulations, your domain is now configured and ready to join for new servers. Please see the additional steps to Create a New VM to join your Domain.
Additional steps: Create a new VM for joining the domain
Go back to your Hyper-V console on your PC. Select New and create a new VM with the following settings:
Now start your VM and install Windows Server 2019 again. For details check the first steps on top of this Tutorial. After the installation is finished, open the Startmenu and click on Control Panel. Click on System. Under Computername section, click on Change settings: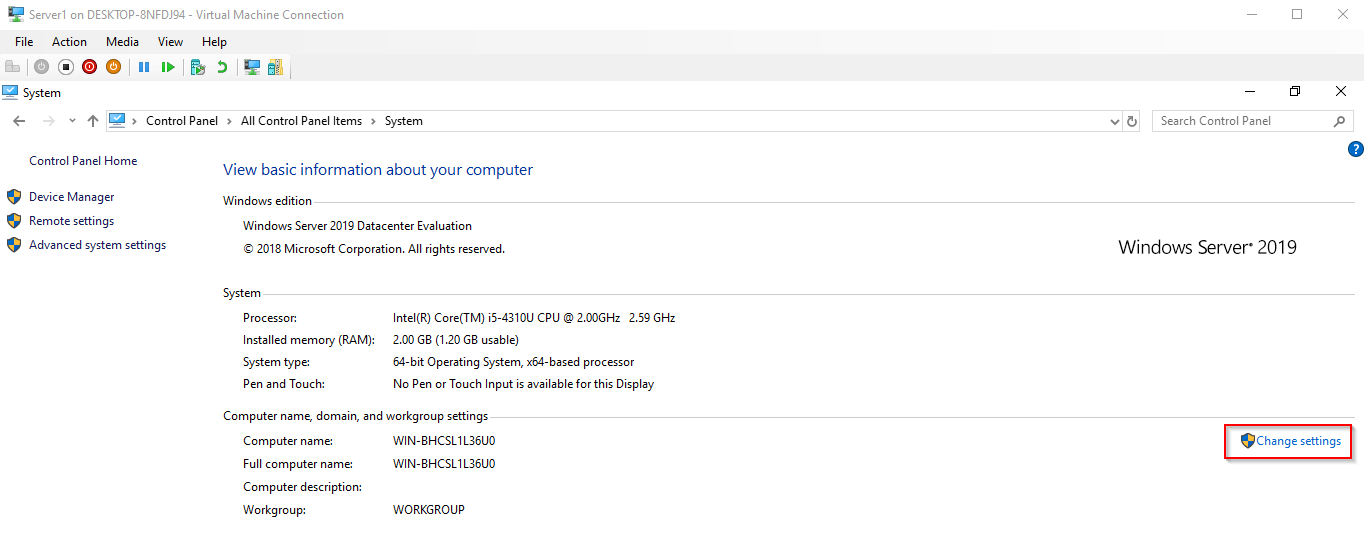
Click on Change again: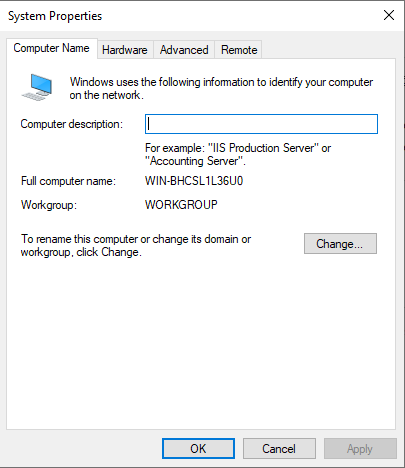
Change the Computername to Server1 and change Member of to Domain, name: yourdomainname: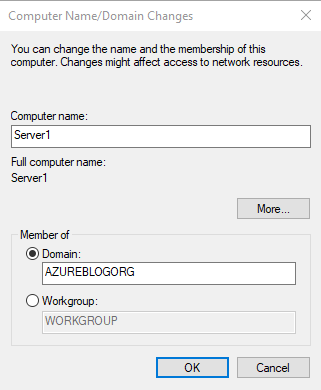
It takes some time, then a login window should appear. Enter the credentials of your Admin user you created when you installed your Domain Controller. After a while, the welcome message shows up: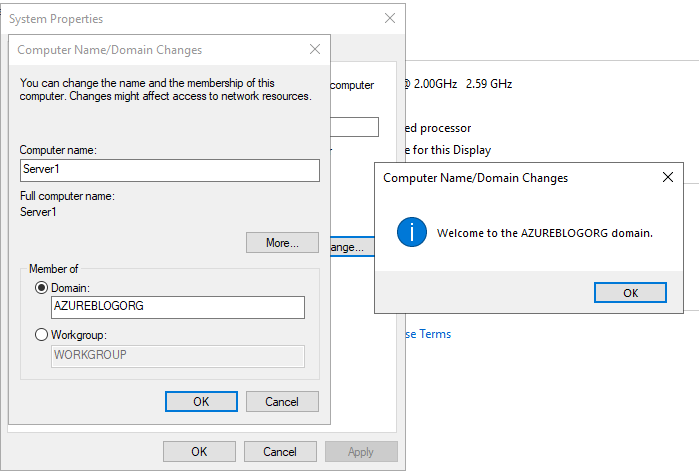
Now your new VM is successfully joined to the domain. Reboot it and you can see it on the new logon screen: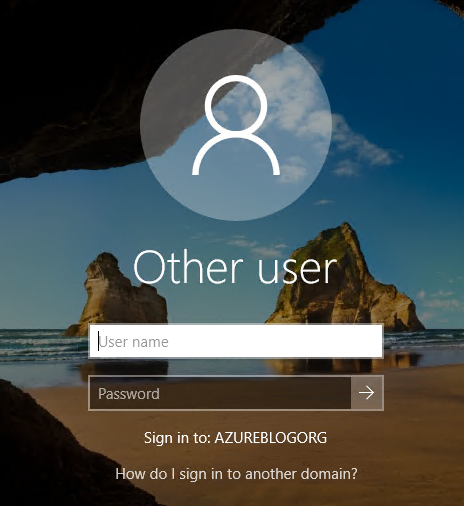
Now we need to create a new user in Active Directory on the Domain Controller, before you can login.